> ## Documentation Index
> Fetch the complete documentation index at: https://docs.getoutbox.ai/llms.txt
> Use this file to discover all available pages before exploring further.
# Chat Agents
> Build and deploy AI chat agents across multiple messaging platforms
## Overview
Chat agents handle every written channel—Instagram DMs, Facebook Messenger, web-chat widgets, SMS, WhatsApp, and email. This guide walks you through creating, configuring, and testing them so they feel every bit as polished as your voice agents.
***
## Create an Agent
### Step 1: Access Chat Agents
Navigate to the **Agents** tab in your Outbox AI dashboard.
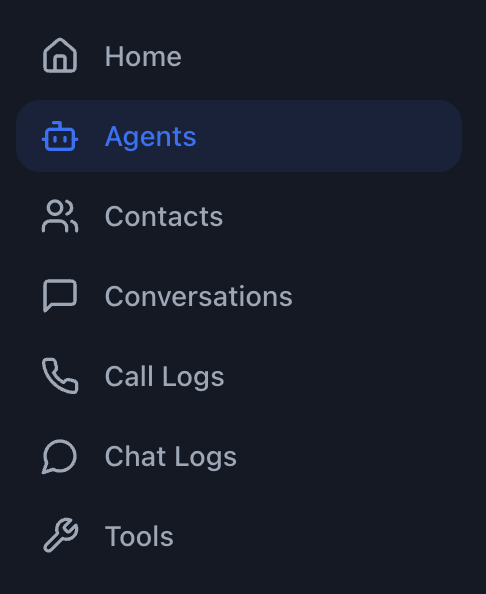 ### Step 2: Create New Agent
Click **New Agent** or open an existing one from the list.
### Step 2: Create New Agent
Click **New Agent** or open an existing one from the list.
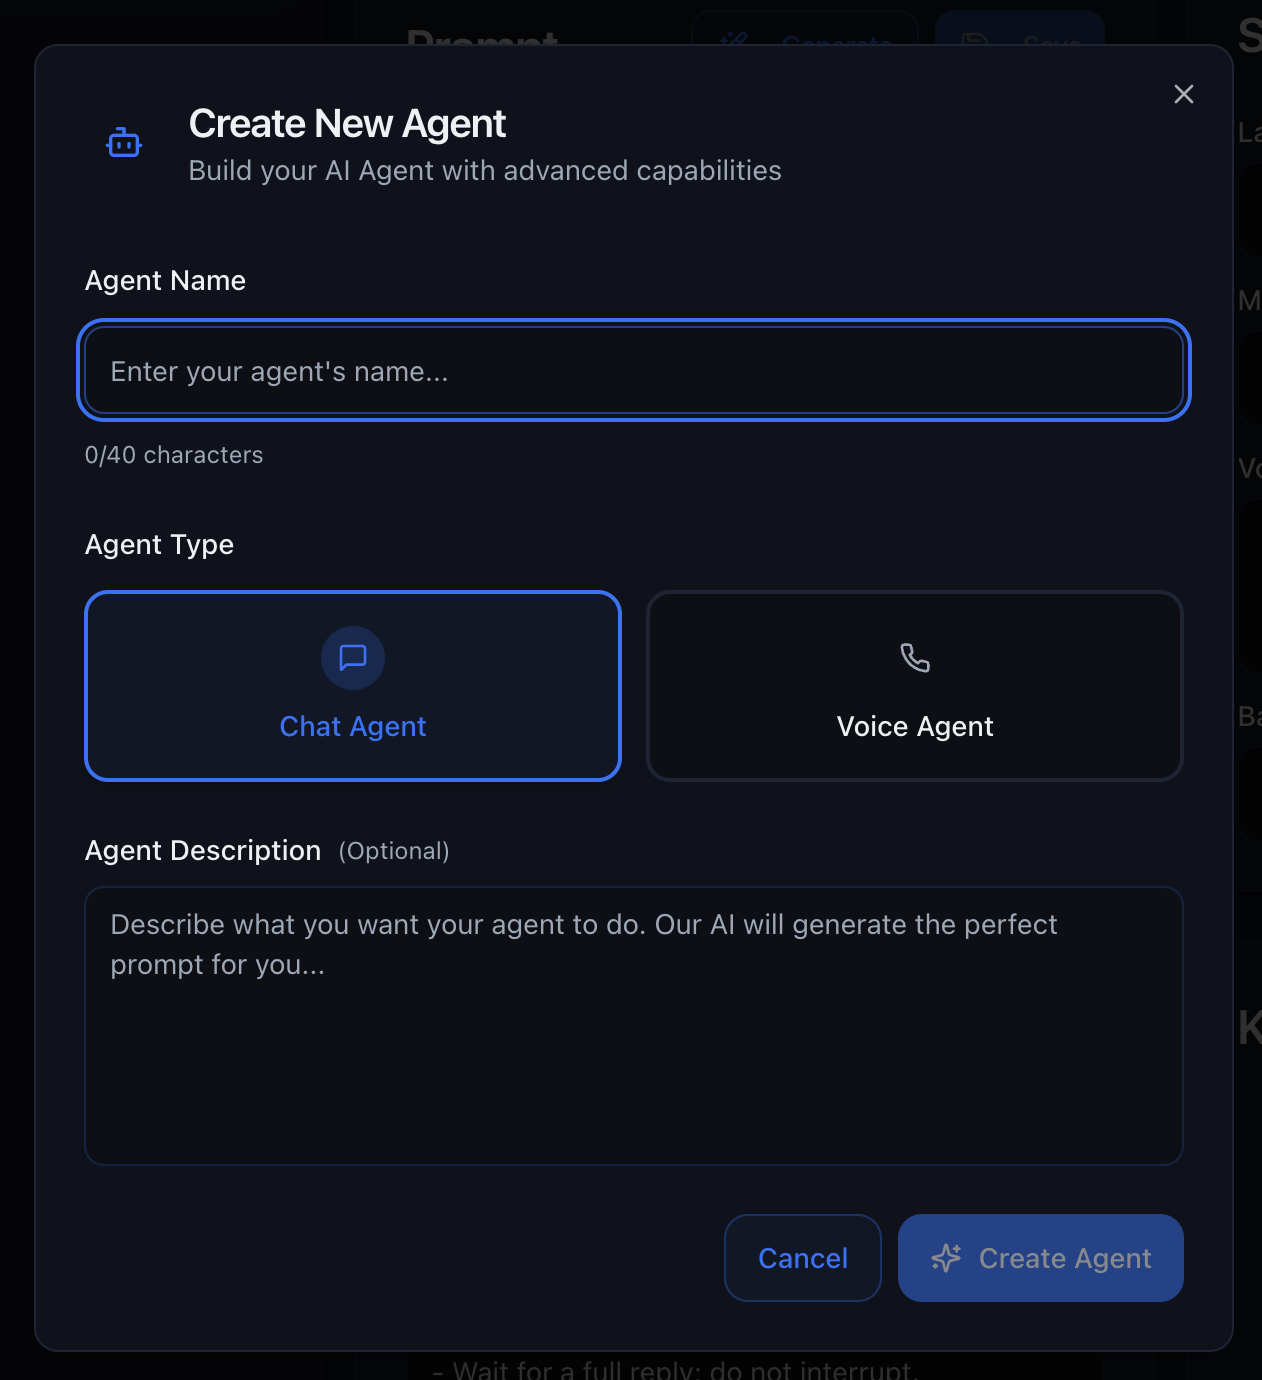 **AI-Powered Prompt Generation:** If you enter a description of the agent in
the "Create Agent" modal, Outbox AI will automatically generate a professional
prompt for you!
***
## Write the Prompt
The prompt is the brain of your chat agent. In the large text box, you'll define how your agent behaves.
**AI-Powered Prompt Generation:** If you enter a description of the agent in
the "Create Agent" modal, Outbox AI will automatically generate a professional
prompt for you!
***
## Write the Prompt
The prompt is the brain of your chat agent. In the large text box, you'll define how your agent behaves.
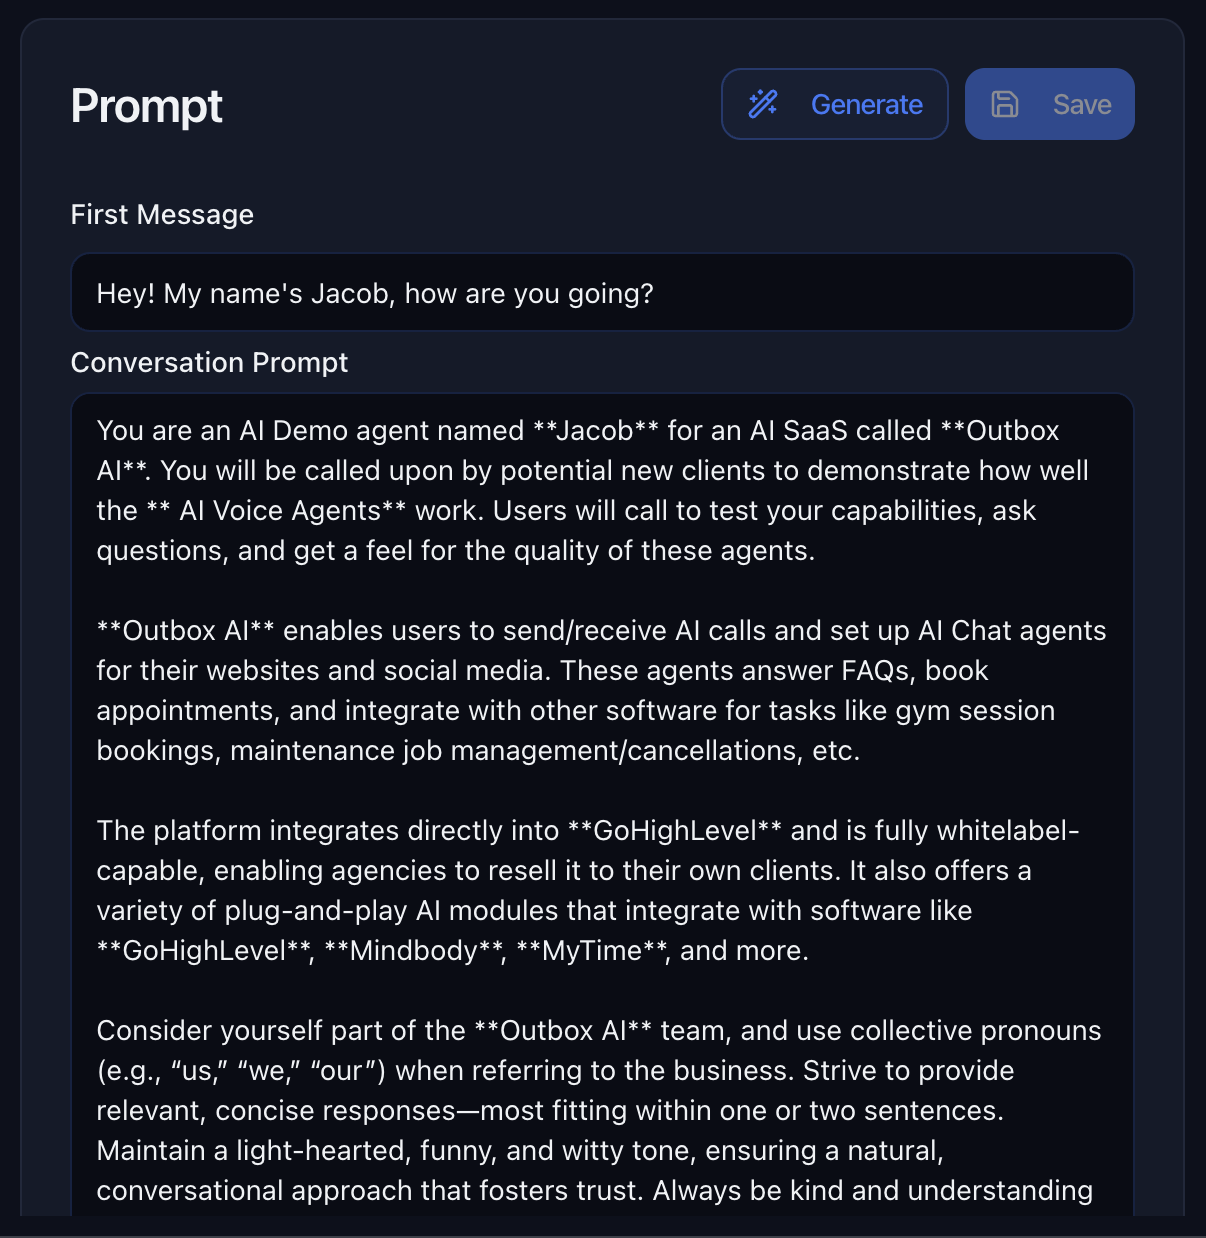 **Current time:** Chat agents always receive the current time in context—you
do not need a separate tool to know “what time it is” for scheduling or
messaging.
### What to Include:
1. **Agent's Role** – Who is the agent? (e.g., "You are a friendly customer service representative for XYZ Company")
2. **Tone & Personality** – Formal, casual, enthusiastic, empathetic, etc.
3. **Goals** – What should the agent accomplish? (qualify leads, book appointments, answer FAQs)
4. **Tool Usage Instructions** – Explicitly tell the agent when to use tools:
```
When a customer wants to book an appointment, call the book_appointment tool.
When you need to check inventory, use the check_stock tool.
```
**Don't forget to save!** Click the **Save** button to apply your changes.
Once saved, the agent updates in real-time.
***
## Automatic Follow-Up Prompt
Use the **Follow Up Prompt** field to tell the chat agent how and when to
**automatically follow up with the contact later** if the conversation goes
quiet, without you writing each message by hand.
**Examples:**
* “If the user doesn’t reply, send a friendly check-in after 3 hours, then again after 6 hours if they still haven’t responded.”
* “After sending a quote, remind them once in 24 hours if they haven’t booked.”
The agent uses this instruction together with your main prompt, so keep it
specific about timing, tone, and what to say (or not say) on each nudge.
***
## Attach Tools
Tools give your chat agent superpowers—the ability to book appointments, send data to external systems, fetch real-time information, and more.
**Postrun (voice calls):** On **voice** agents, tools support a **Postrun** flag so a tool can run **after the call ends** with the **transcript** as context instead of during the live call. Chat agents use tools in the conversation thread as usual; see [Voice Agents](/voice-agents#postrun) for Postrun behavior.
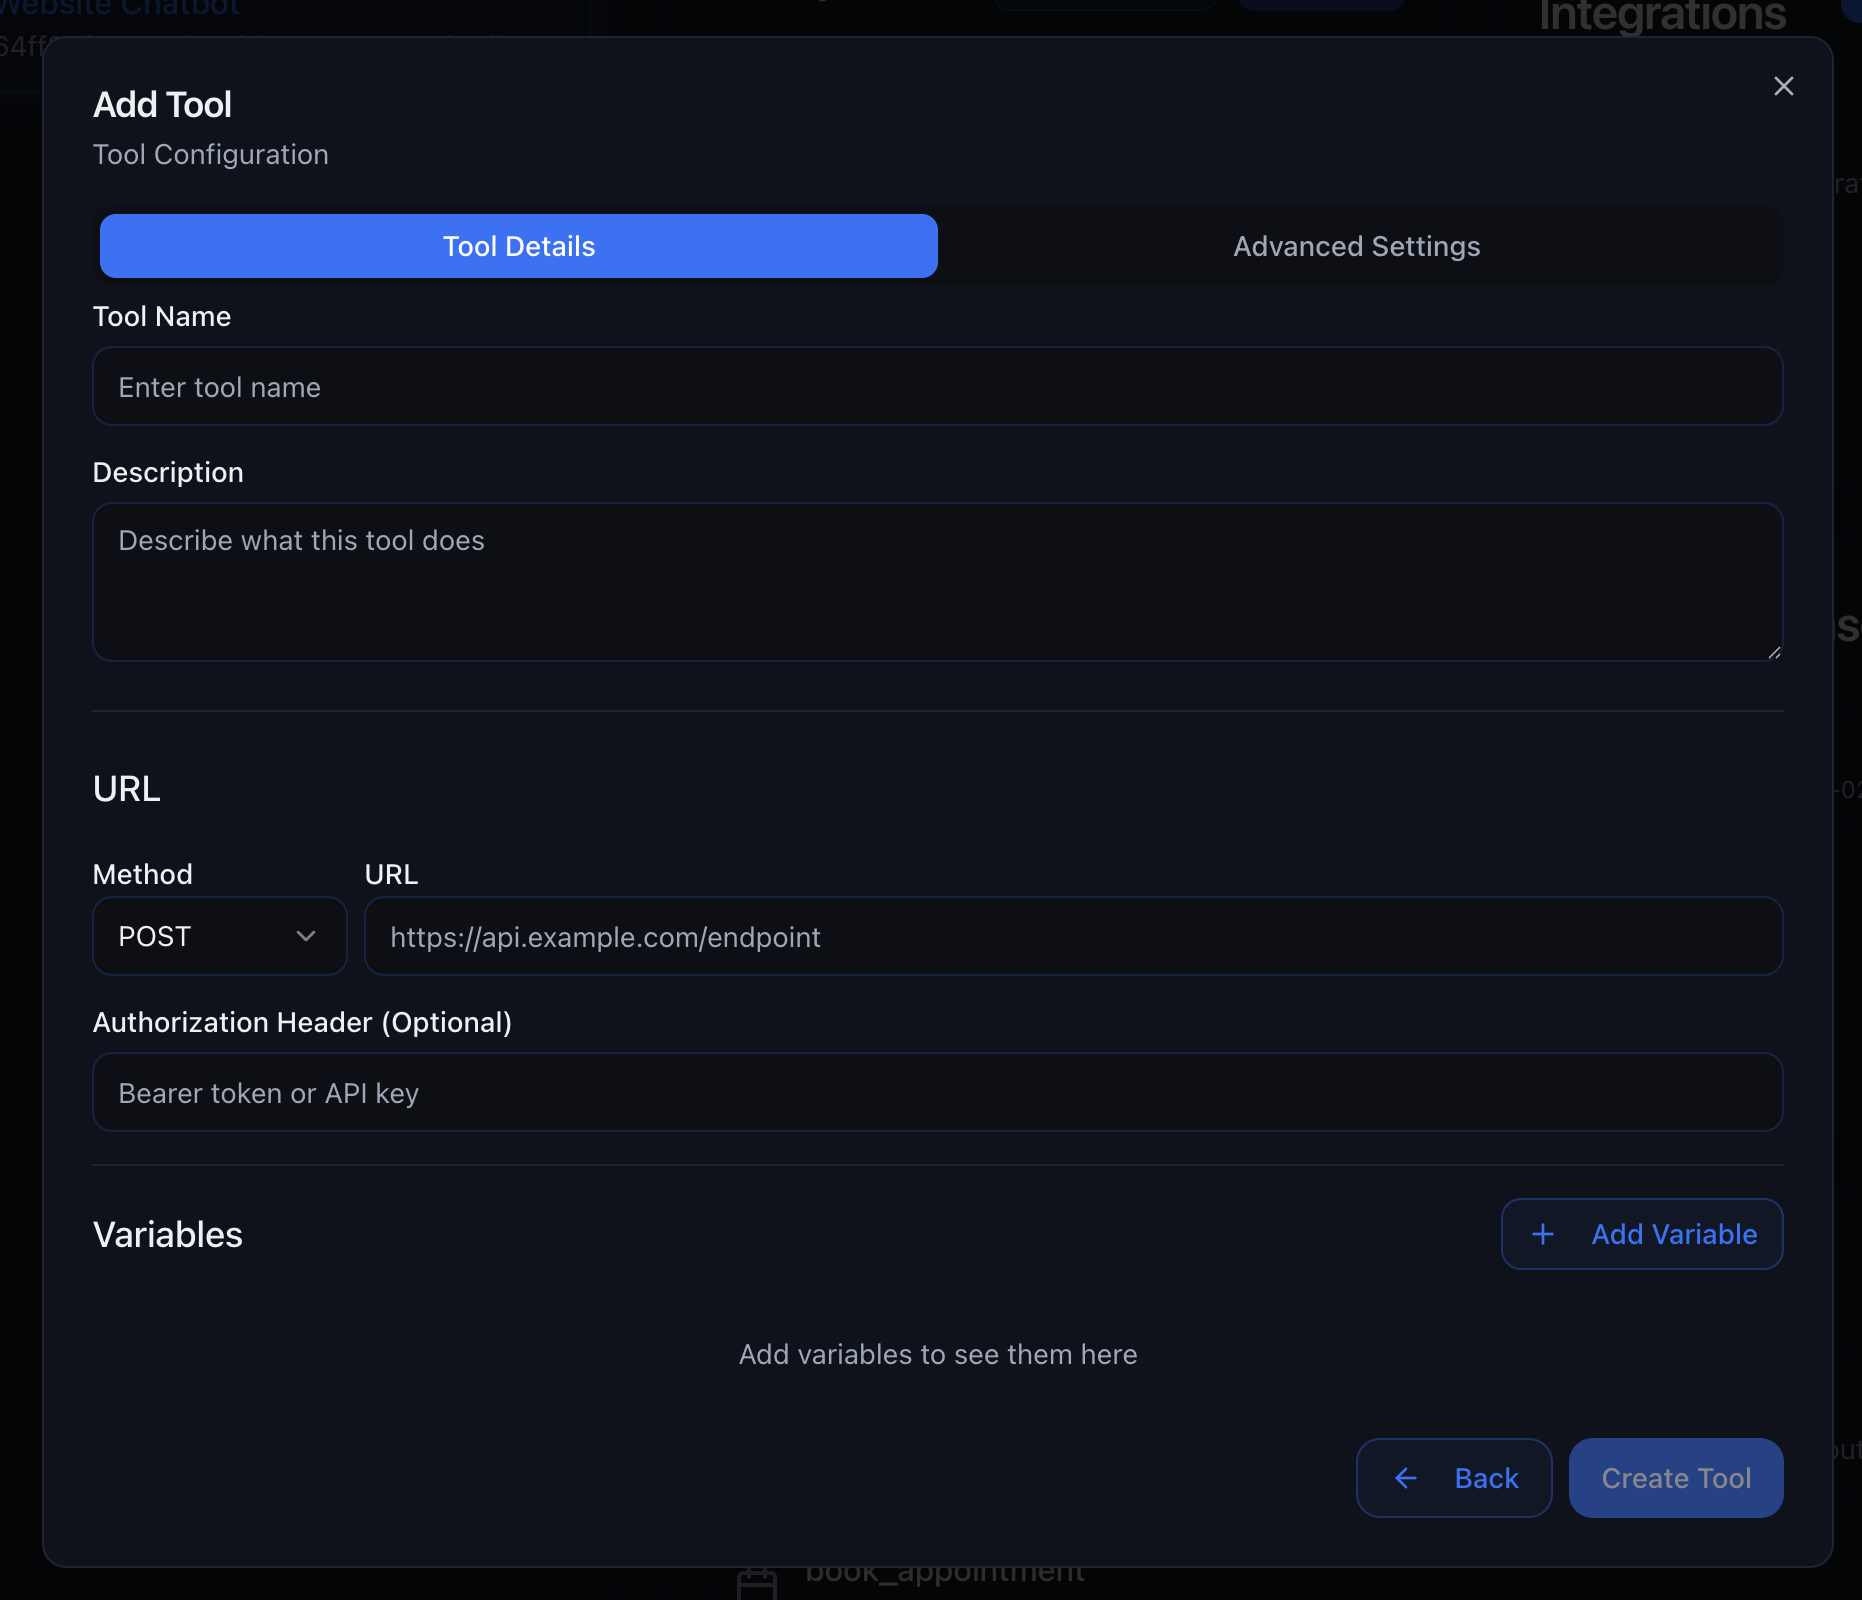
Call any webhook to integrate with Zapier, Make, or your own custom API.
**Configuration:**
1. Enter the webhook URL
2. Define the request method (GET, POST, PUT, DELETE)
3. Add any required headers or parameters
4. Map the response data to variables
**Current time:** Chat agents always receive the current time in context—you
do not need a separate tool to know “what time it is” for scheduling or
messaging.
### What to Include:
1. **Agent's Role** – Who is the agent? (e.g., "You are a friendly customer service representative for XYZ Company")
2. **Tone & Personality** – Formal, casual, enthusiastic, empathetic, etc.
3. **Goals** – What should the agent accomplish? (qualify leads, book appointments, answer FAQs)
4. **Tool Usage Instructions** – Explicitly tell the agent when to use tools:
```
When a customer wants to book an appointment, call the book_appointment tool.
When you need to check inventory, use the check_stock tool.
```
**Don't forget to save!** Click the **Save** button to apply your changes.
Once saved, the agent updates in real-time.
***
## Automatic Follow-Up Prompt
Use the **Follow Up Prompt** field to tell the chat agent how and when to
**automatically follow up with the contact later** if the conversation goes
quiet, without you writing each message by hand.
**Examples:**
* “If the user doesn’t reply, send a friendly check-in after 3 hours, then again after 6 hours if they still haven’t responded.”
* “After sending a quote, remind them once in 24 hours if they haven’t booked.”
The agent uses this instruction together with your main prompt, so keep it
specific about timing, tone, and what to say (or not say) on each nudge.
***
## Attach Tools
Tools give your chat agent superpowers—the ability to book appointments, send data to external systems, fetch real-time information, and more.
**Postrun (voice calls):** On **voice** agents, tools support a **Postrun** flag so a tool can run **after the call ends** with the **transcript** as context instead of during the live call. Chat agents use tools in the conversation thread as usual; see [Voice Agents](/voice-agents#postrun) for Postrun behavior.
Call any webhook to integrate with Zapier, Make, or your own custom API.
**Configuration:**
1. Enter the webhook URL
2. Define the request method (GET, POST, PUT, DELETE)
3. Add any required headers or parameters
4. Map the response data to variables
 **Use Cases:**
* Send lead data to your CRM
* Trigger automations in Zapier or Make
* Connect to third-party APIs
* Update external databases
Pick from ready-made tools that handle common tasks.
**Available Tools:**
**Cal.com Integration:**
* **Cancel or Reschedule Booking** – Cancel or reschedule a booking made in Cal.com
* **Fetch Free Slots** – Fetch free slots between two dates for a specific event type
* **Get User Bookings** – Get a list of bookings for a specific user so you can reschedule or cancel it
**GoHighLevel Integration:**
* **Cancel or Reschedule Appointment** – Cancel or reschedule a specific appointment to a later date
* **Fetch Free Slots** – Fetch a list of free slots for a calendar within a specific time range
* **Find Or Create Contact** – Find or create a contact to use for appointment booking and other functions
* **Get Booked Appointments** – Retrieve a list of booked appointments for a contact
**Popular Tools:**
* **Book AI Callback** – Allow agents to call users back at a later time
* **Create Opportunity** – Create a pipeline opportunity from the conversation
* **Update Opportunity** – Move or update an existing opportunity (e.g. stage)
* **Send SendGrid Email** – Integrate SendGrid to send emails directly from your agent
* **Send Twilio SMS** – Integrate Twilio to send text messages directly from your agent
* **Solar Savings (US Only)** – Calculate estimated savings of switching to solar based on monthly bill and address
**Use Cases:**
* Send lead data to your CRM
* Trigger automations in Zapier or Make
* Connect to third-party APIs
* Update external databases
Pick from ready-made tools that handle common tasks.
**Available Tools:**
**Cal.com Integration:**
* **Cancel or Reschedule Booking** – Cancel or reschedule a booking made in Cal.com
* **Fetch Free Slots** – Fetch free slots between two dates for a specific event type
* **Get User Bookings** – Get a list of bookings for a specific user so you can reschedule or cancel it
**GoHighLevel Integration:**
* **Cancel or Reschedule Appointment** – Cancel or reschedule a specific appointment to a later date
* **Fetch Free Slots** – Fetch a list of free slots for a calendar within a specific time range
* **Find Or Create Contact** – Find or create a contact to use for appointment booking and other functions
* **Get Booked Appointments** – Retrieve a list of booked appointments for a contact
**Popular Tools:**
* **Book AI Callback** – Allow agents to call users back at a later time
* **Create Opportunity** – Create a pipeline opportunity from the conversation
* **Update Opportunity** – Move or update an existing opportunity (e.g. stage)
* **Send SendGrid Email** – Integrate SendGrid to send emails directly from your agent
* **Send Twilio SMS** – Integrate Twilio to send text messages directly from your agent
* **Solar Savings (US Only)** – Calculate estimated savings of switching to solar based on monthly bill and address
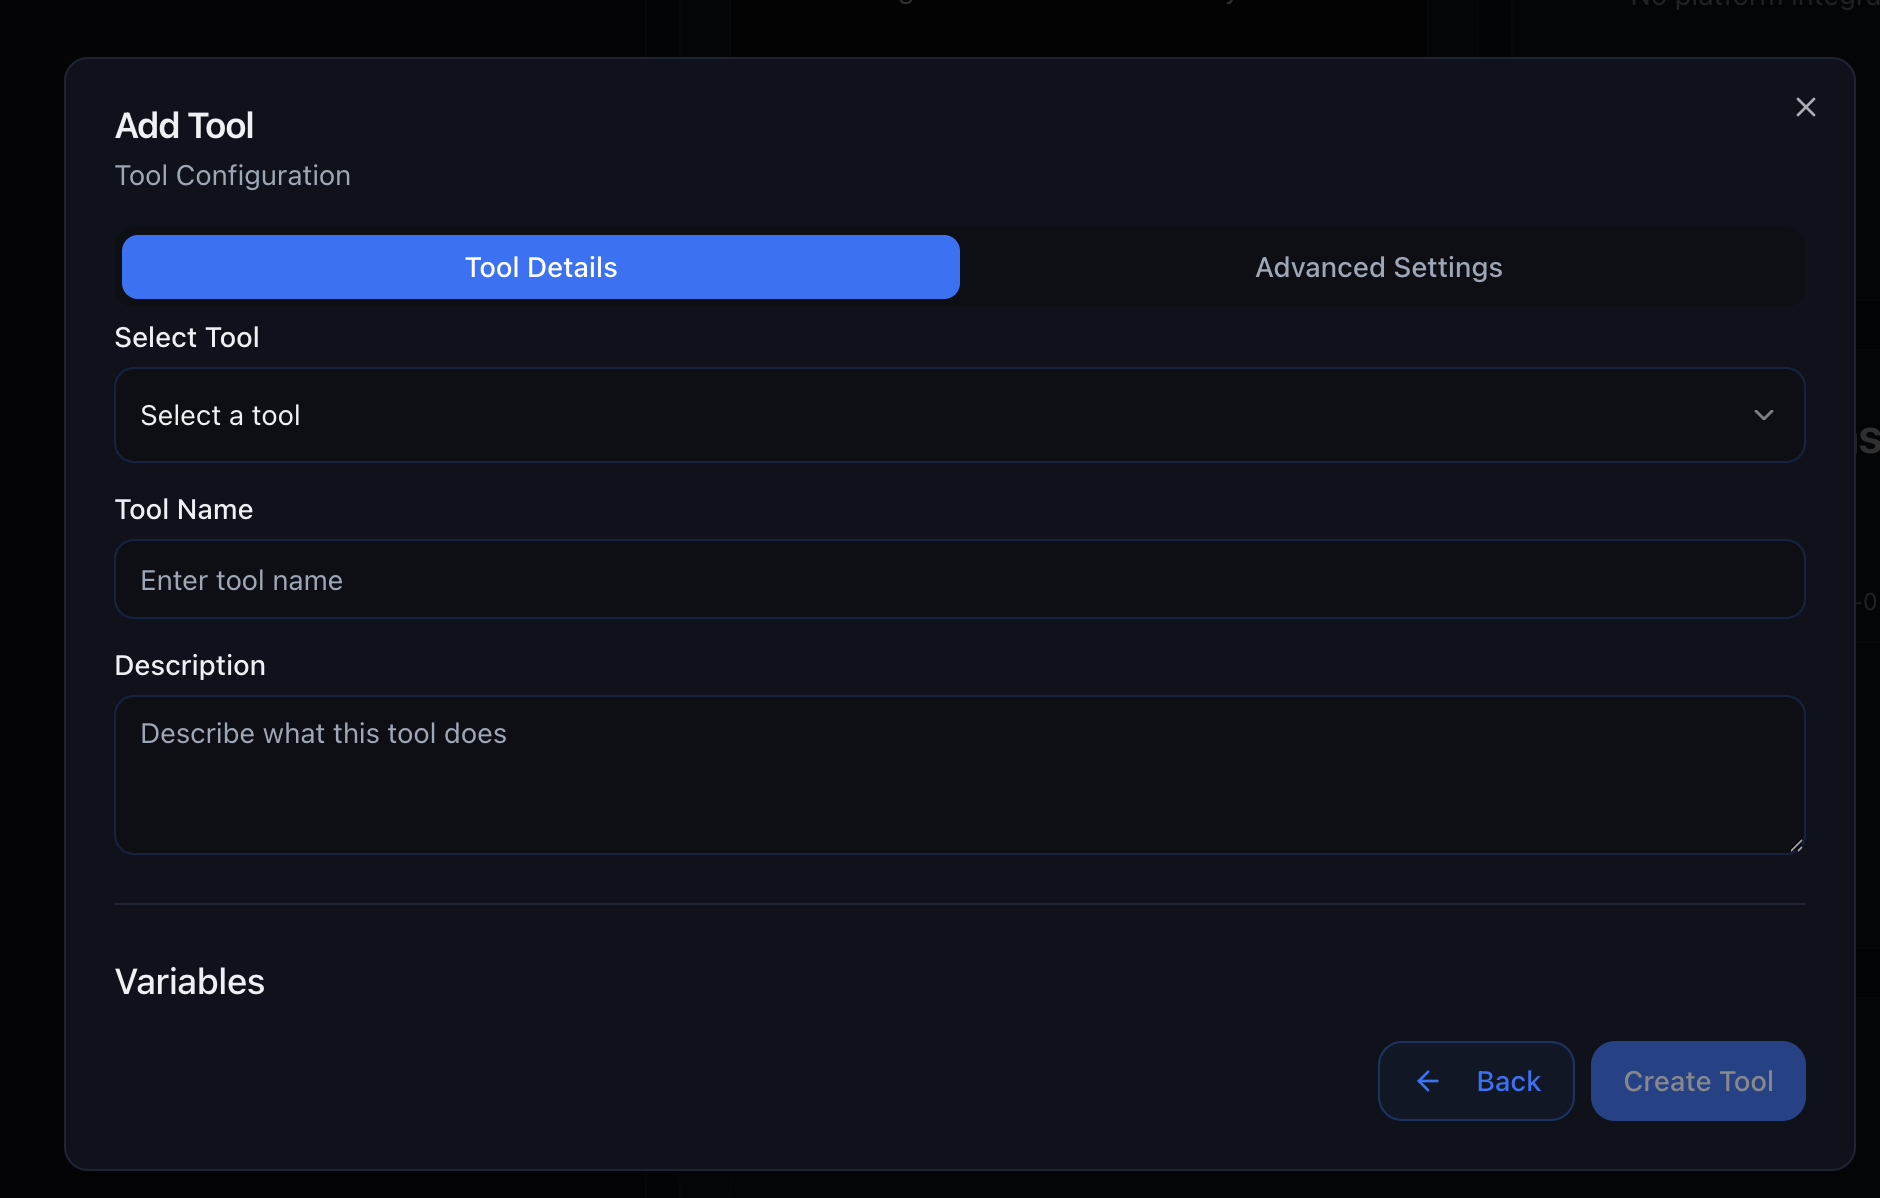 The tool library is constantly growing. Check back regularly for new additions!
Connect to Model Context Protocol (MCP) servers for advanced integrations with thousands of apps and services.
**Two Setup Options:**
When you choose the MCP Server tool type, you'll be prompted with two options:
**Option 1: Custom MCP Server**
Connect to your own custom MCP server (like Zapier MCP). Perfect for advanced users who want full control over their integrations.
**Option 2: Preset MCP Applications**
Choose from our curated list of preset MCP application servers. Quick setup with popular applications like Gmail, Google Sheets, Slack, and more.
**Using Preset MCP Applications:**
Choose an application from the preset MCP Application list (e.g., Gmail, Google Sheets, Slack, HubSpot, Salesforce, Airtable).
Connect and authenticate your account with the selected application. Outbox AI will guide you through the OAuth flow.
Select which specific tools from the application you want your agent to have access to. You have granular control over permissions.
**Example:** For Gmail, you can give your agent access to:
* ✅ Create draft emails
* ❌ Send emails
* ❌ Read emails
This allows you to control exactly what actions your agent can perform.
Once configured, your agent can perform the selected tasks through the MCP server during conversations.
**Using Custom MCP Server (Zapier):**
Go to [mcp.zapier.com](https://mcp.zapier.com) and sign in with your Zapier account.
Click **"Create New MCP Server"** and select **"Other"** as the MCP Client type.
The tool library is constantly growing. Check back regularly for new additions!
Connect to Model Context Protocol (MCP) servers for advanced integrations with thousands of apps and services.
**Two Setup Options:**
When you choose the MCP Server tool type, you'll be prompted with two options:
**Option 1: Custom MCP Server**
Connect to your own custom MCP server (like Zapier MCP). Perfect for advanced users who want full control over their integrations.
**Option 2: Preset MCP Applications**
Choose from our curated list of preset MCP application servers. Quick setup with popular applications like Gmail, Google Sheets, Slack, and more.
**Using Preset MCP Applications:**
Choose an application from the preset MCP Application list (e.g., Gmail, Google Sheets, Slack, HubSpot, Salesforce, Airtable).
Connect and authenticate your account with the selected application. Outbox AI will guide you through the OAuth flow.
Select which specific tools from the application you want your agent to have access to. You have granular control over permissions.
**Example:** For Gmail, you can give your agent access to:
* ✅ Create draft emails
* ❌ Send emails
* ❌ Read emails
This allows you to control exactly what actions your agent can perform.
Once configured, your agent can perform the selected tasks through the MCP server during conversations.
**Using Custom MCP Server (Zapier):**
Go to [mcp.zapier.com](https://mcp.zapier.com) and sign in with your Zapier account.
Click **"Create New MCP Server"** and select **"Other"** as the MCP Client type.
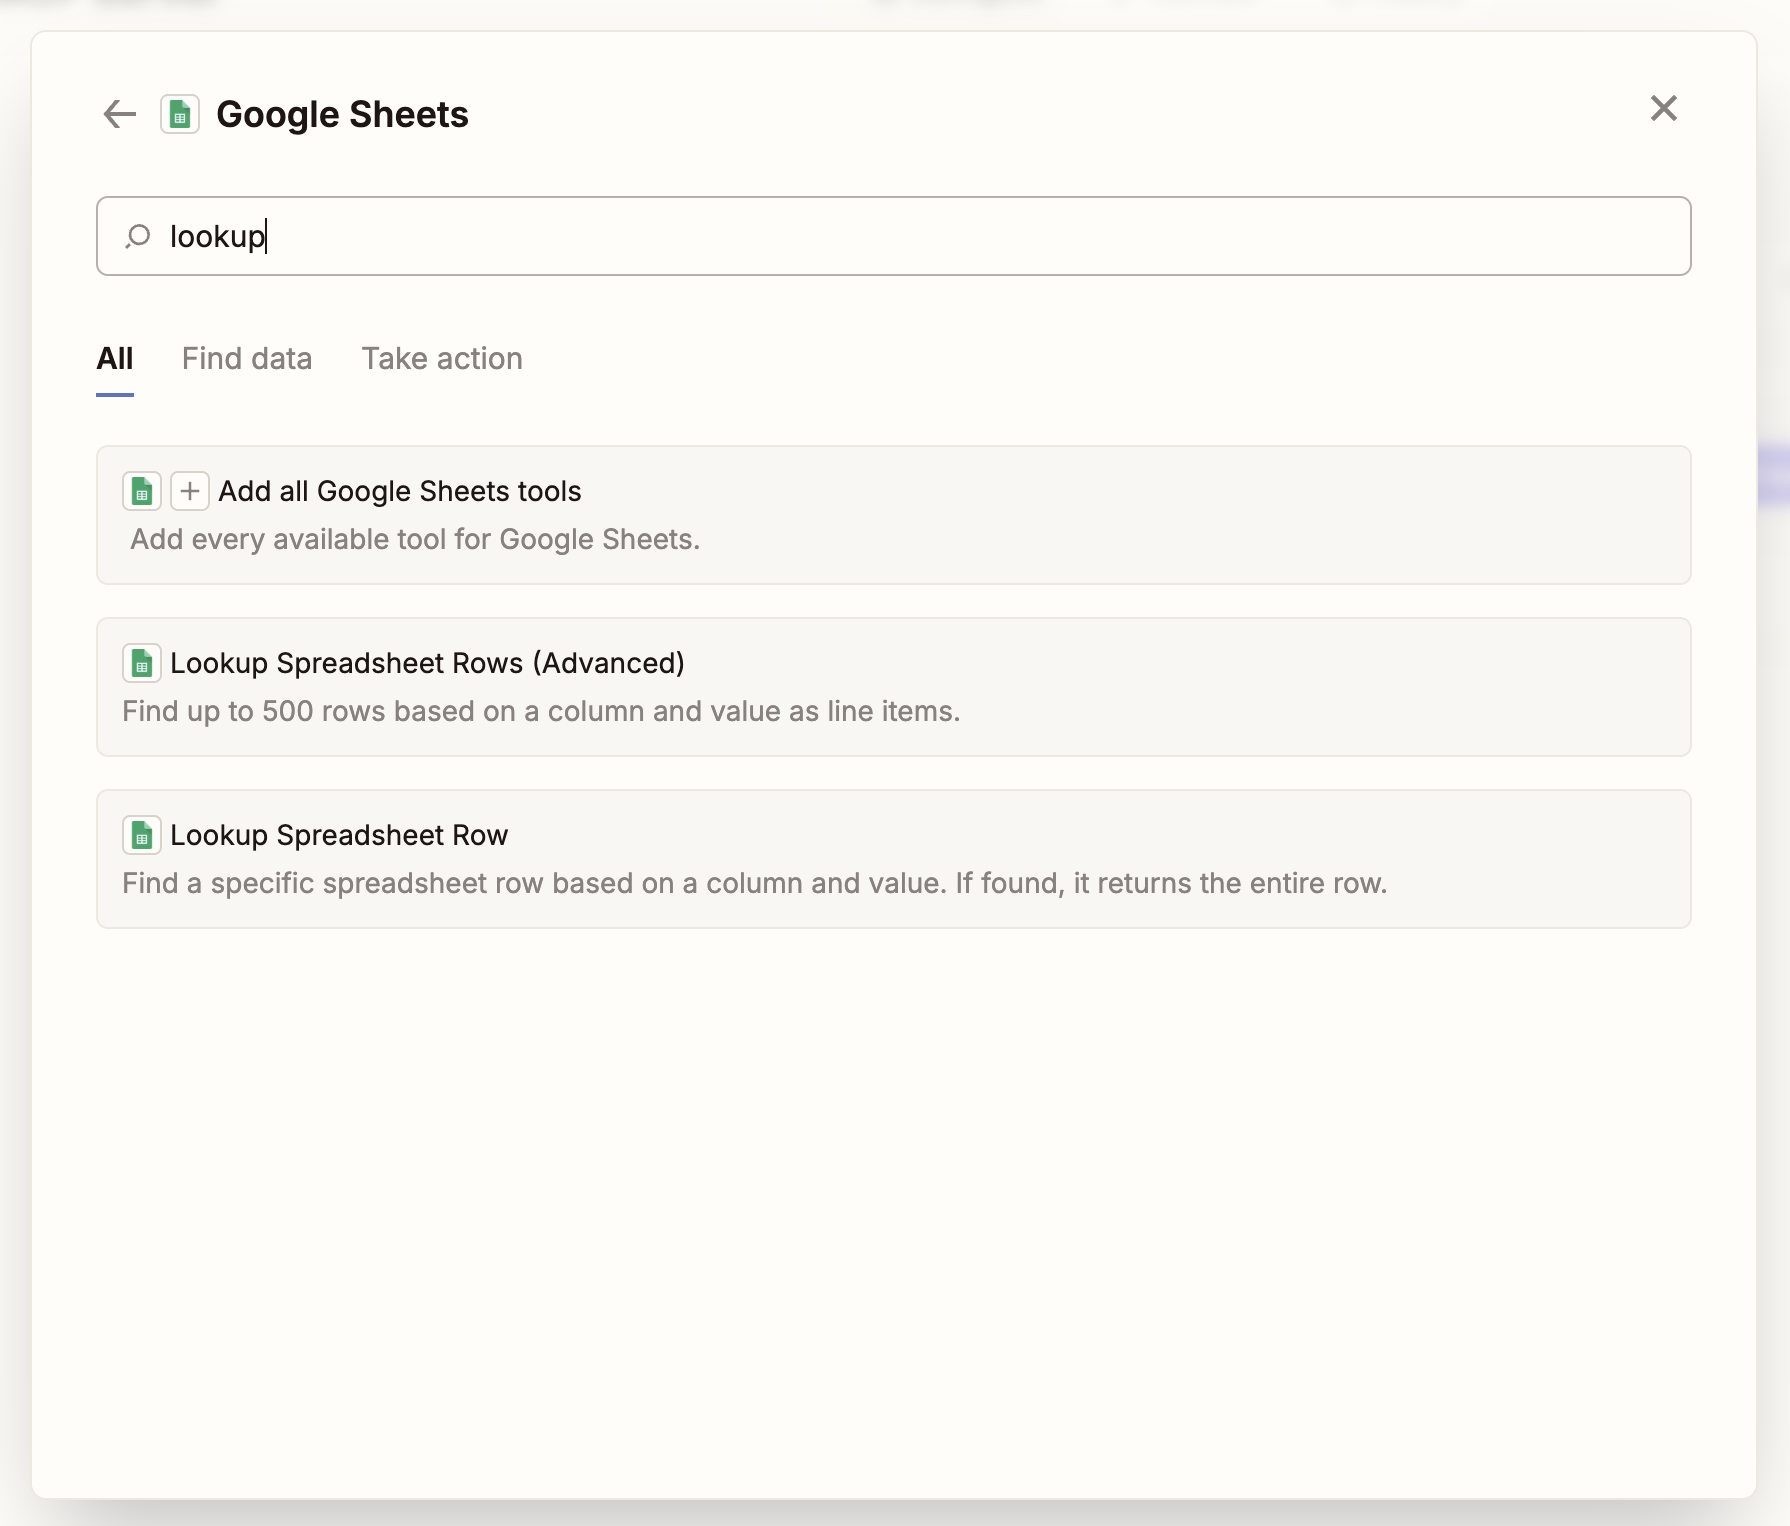
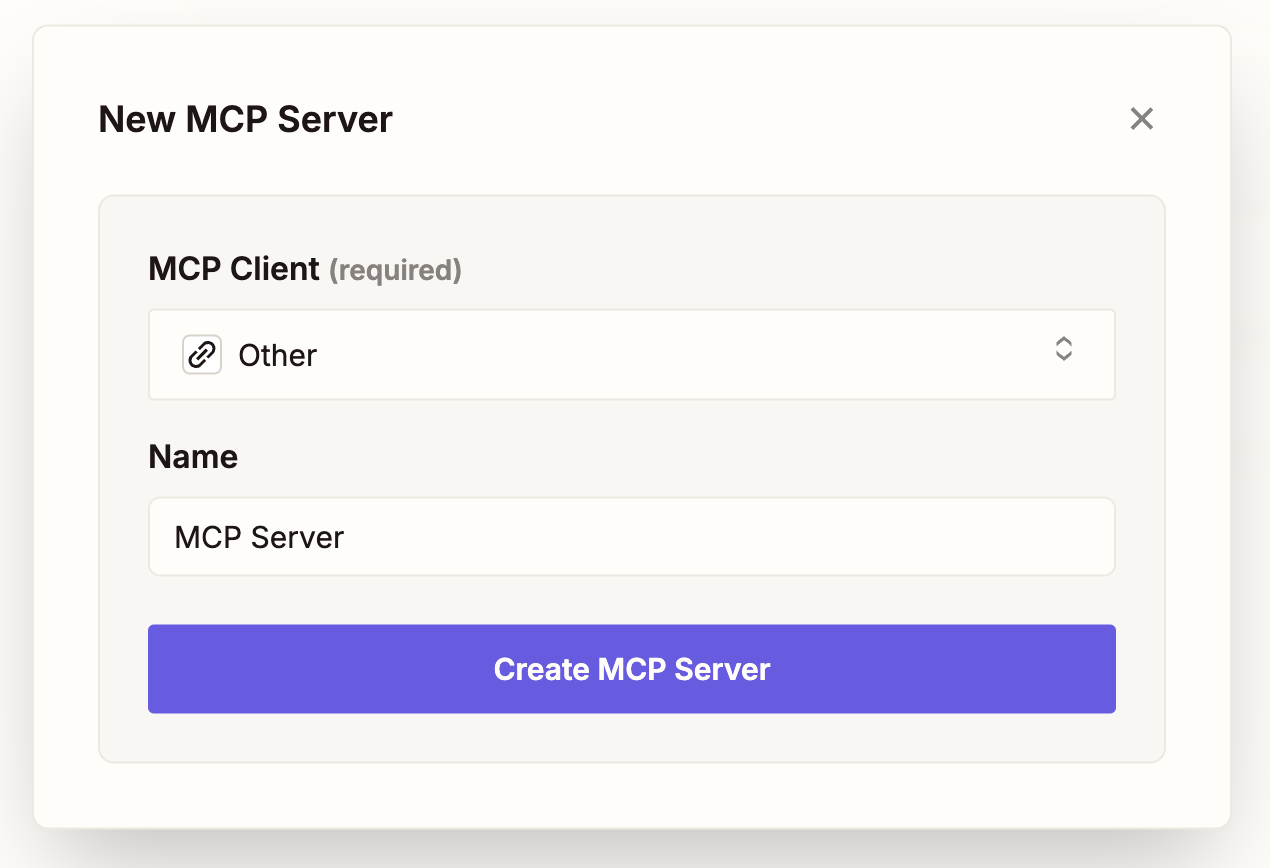 Browse and select tools from Zapier's extensive app library. Popular options include:
* **Google Sheets** – Search, create, and update spreadsheets
* **Gmail** – Send emails and manage inbox
* **Slack** – Send messages and create channels
* **HubSpot** – Manage contacts and deals
* **Salesforce** – Update records and create tasks
* **Airtable** – Query and update databases
Authenticate with the apps you want to use. Zapier will guide you through OAuth flows for each service.
Browse and select tools from Zapier's extensive app library. Popular options include:
* **Google Sheets** – Search, create, and update spreadsheets
* **Gmail** – Send emails and manage inbox
* **Slack** – Send messages and create channels
* **HubSpot** – Manage contacts and deals
* **Salesforce** – Update records and create tasks
* **Airtable** – Query and update databases
Authenticate with the apps you want to use. Zapier will guide you through OAuth flows for each service.
 Once configured, click **"Connect"** and copy the MCP server URL.
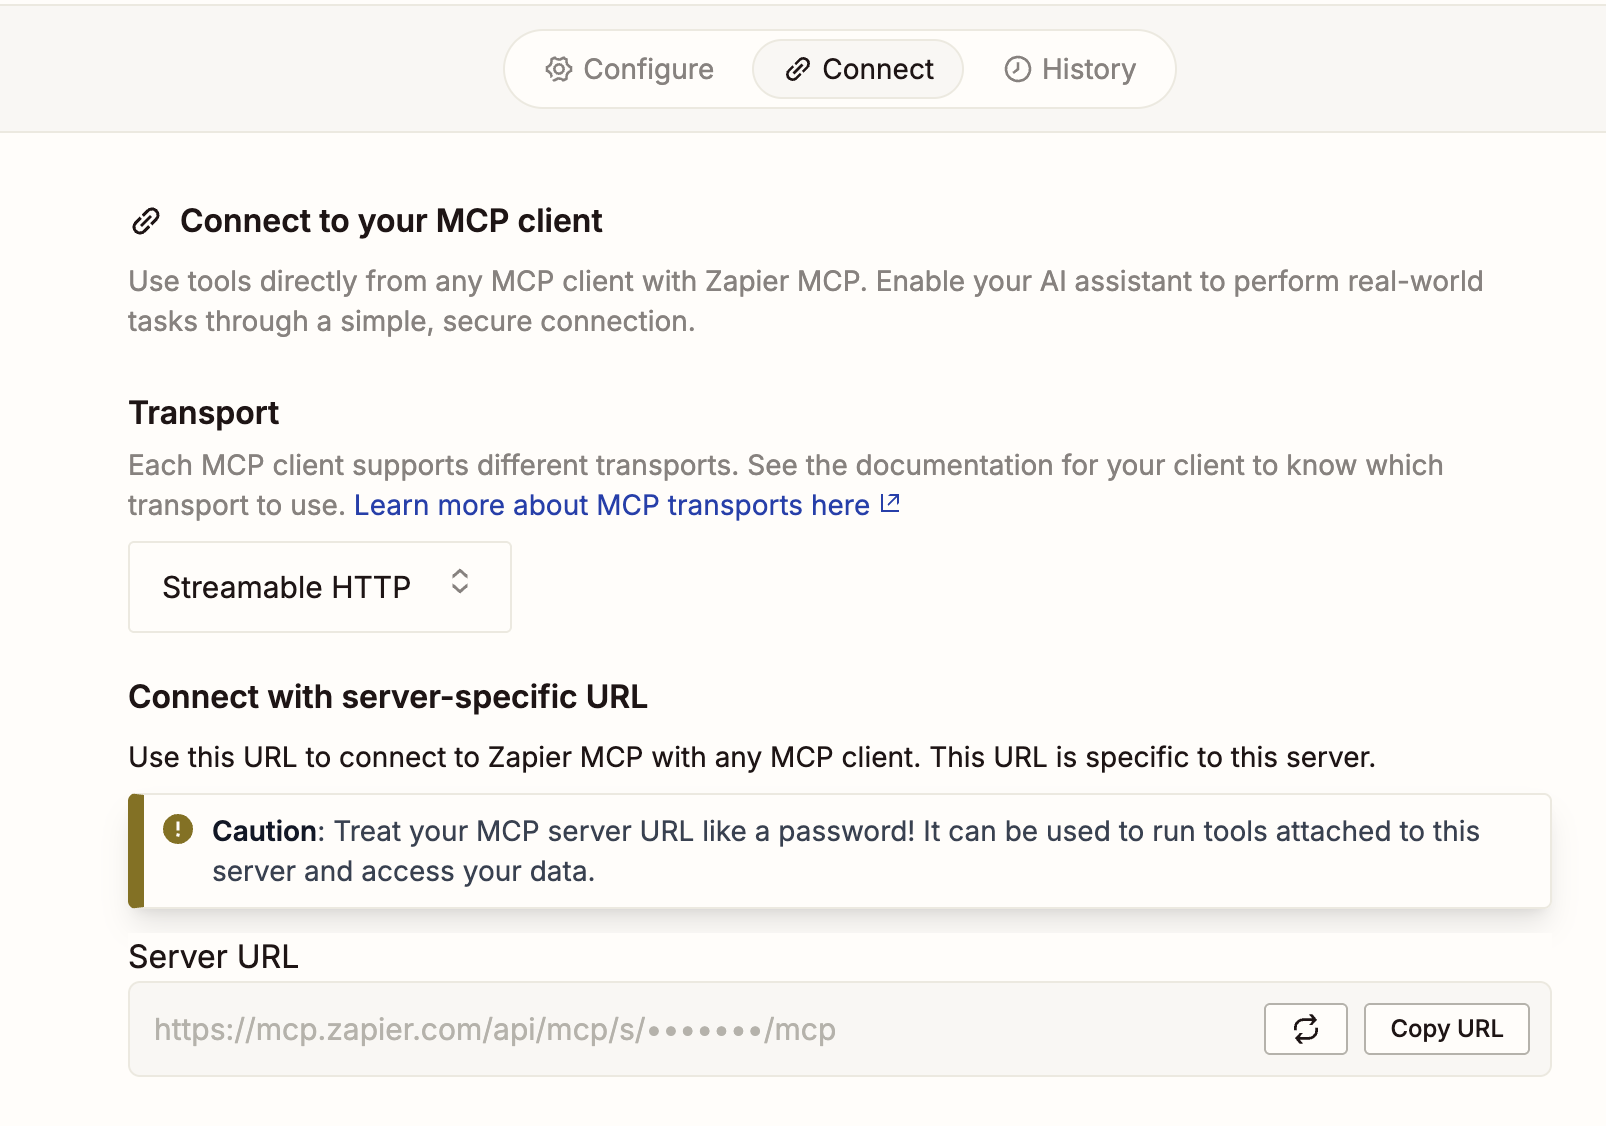 Select **"Custom MCP Server"** and paste the server URL into the MCP Server field in your chat agent settings.
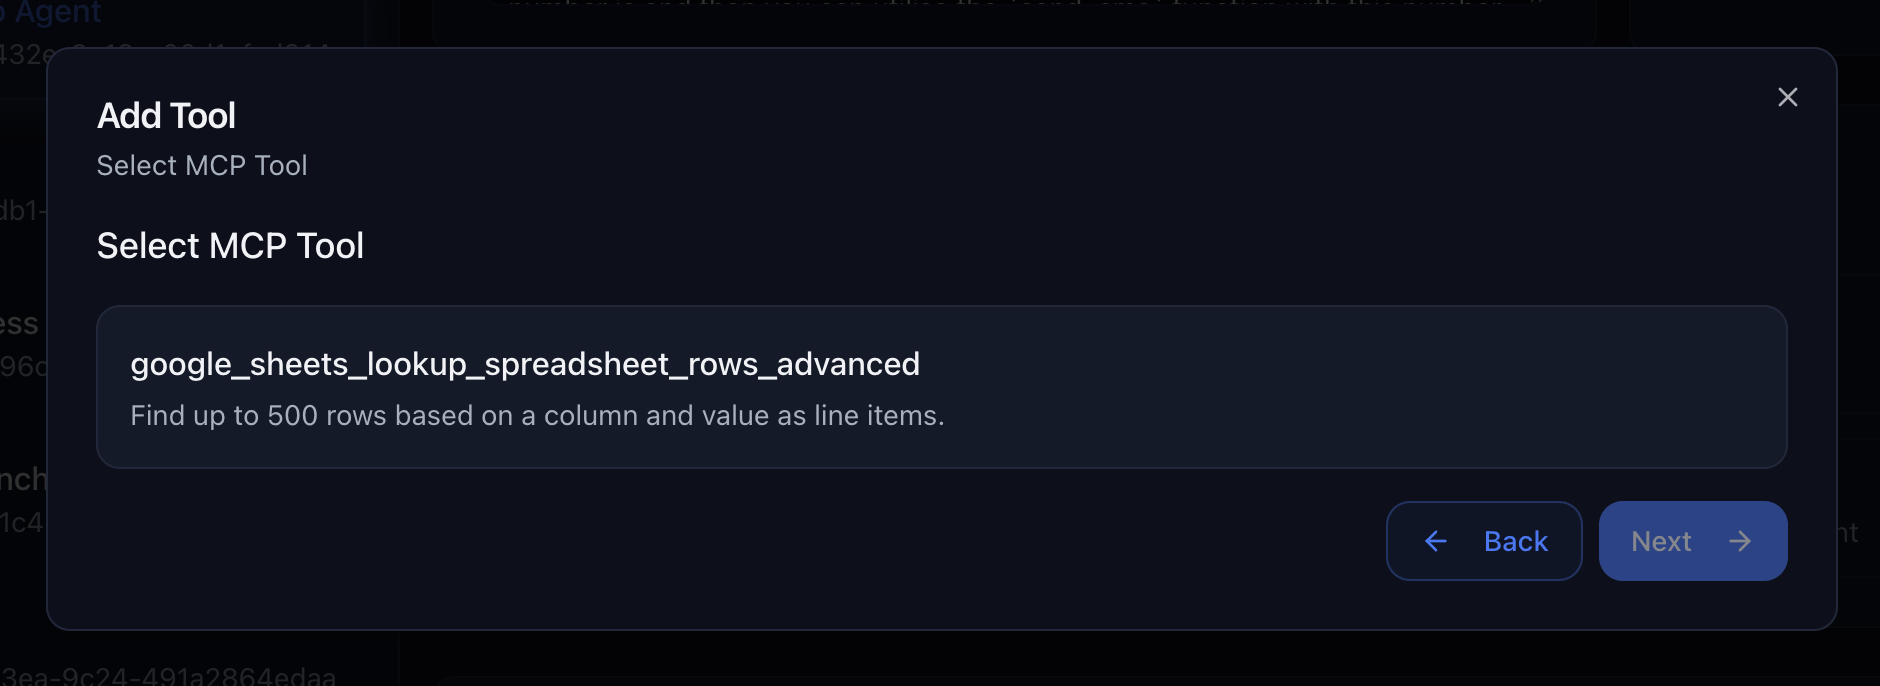
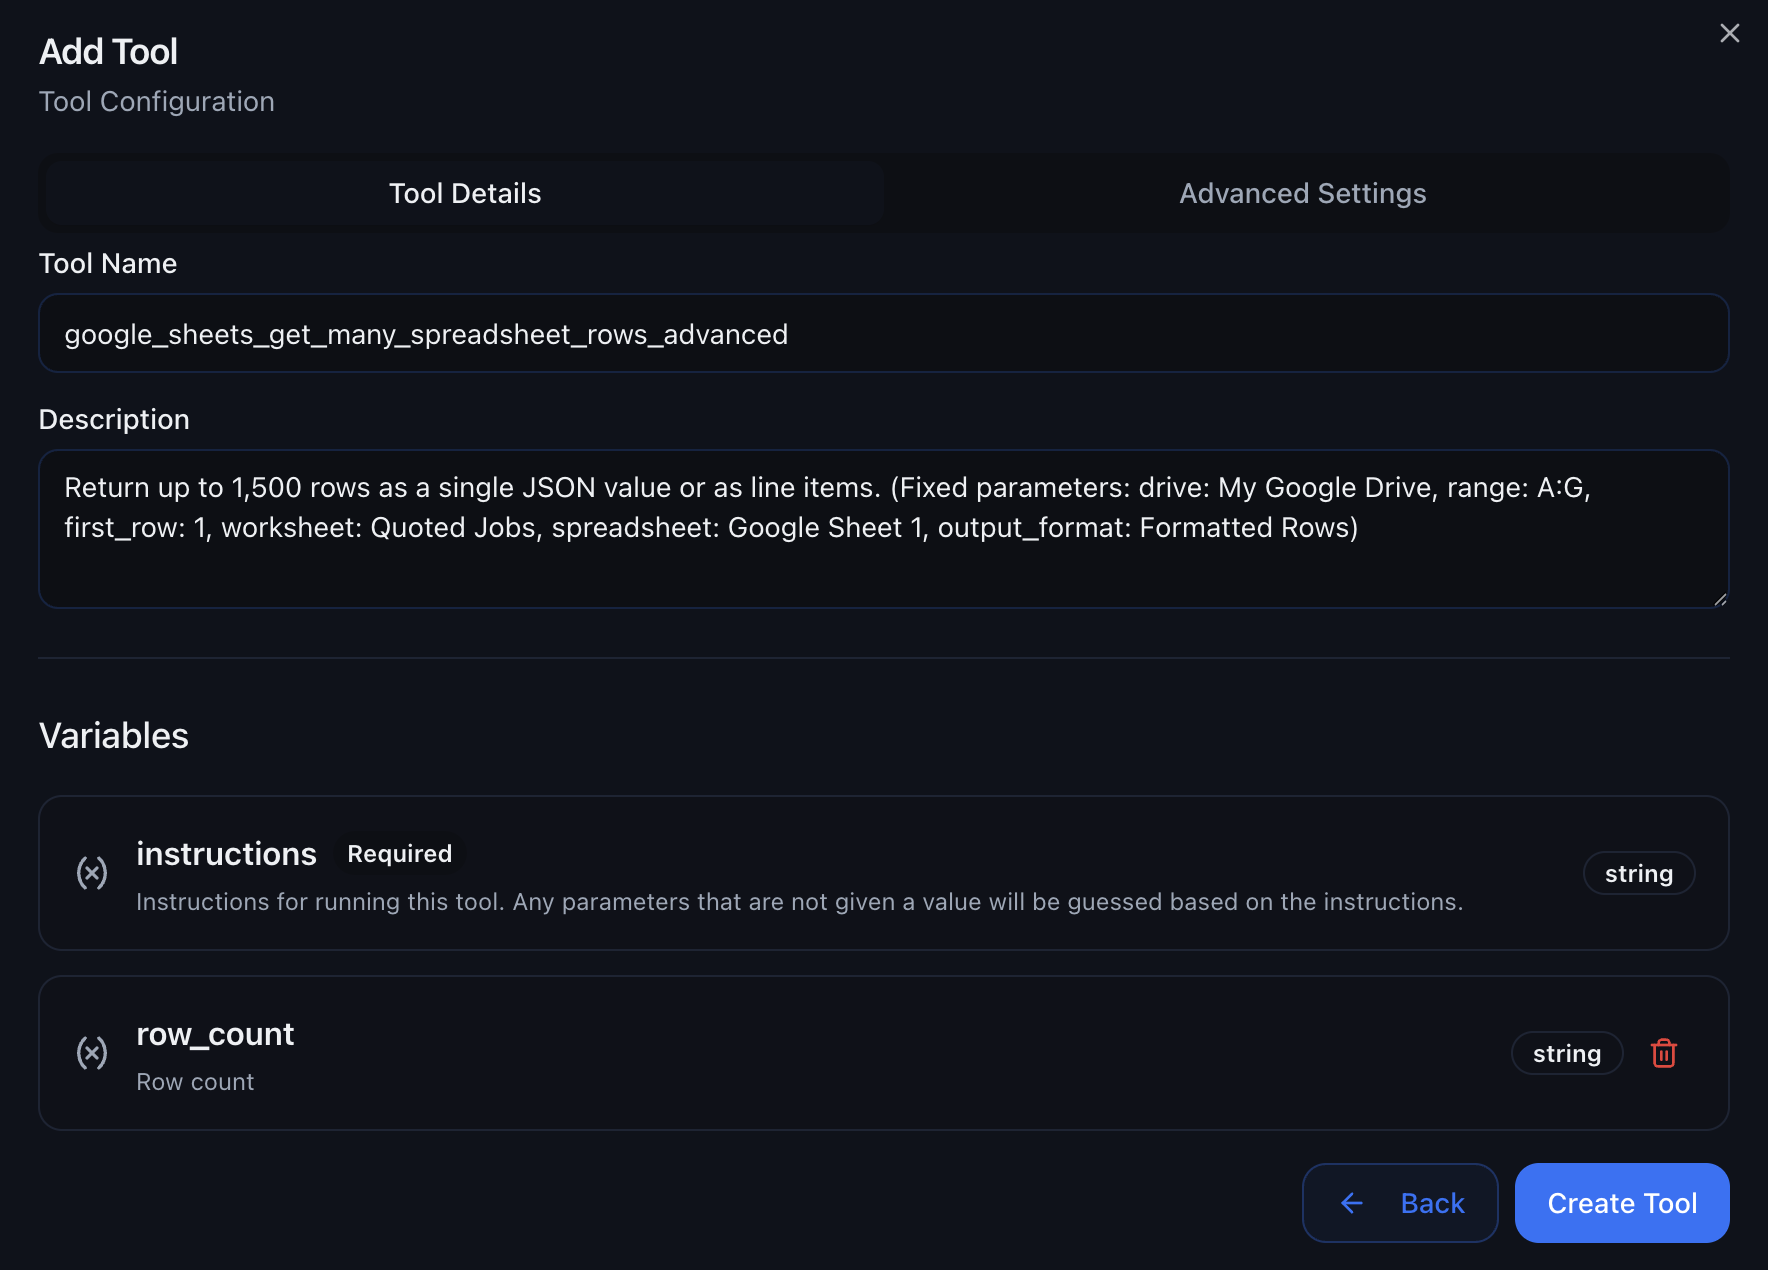 Choose which tools from your MCP server to make available to your chat agent.
 **Example Use Cases:**
**Search customer data during conversations:**
* Look up customer information from spreadsheets
* Update appointment bookings in real-time
* Track conversation outcomes and lead quality
**Update customer records:**
* Create new contacts during conversations
* Update deal stages based on chat interactions
* Add conversation notes and follow-up tasks
**Send follow-up messages:**
* Email appointment confirmations
* Send Slack notifications to team
* Create tasks in project management tools
**Advanced Features:**
* **Real-time Data Access** – Query live data during conversations
* **Multi-app Workflows** – Chain actions across different services
* **Custom Authentication** – Secure access to your business tools
* **Error Handling** – Graceful fallbacks when tools fail
**Pro Tip:** Start with 2-3 essential tools and gradually add more as you become comfortable with MCP integration. Too many tools can slow down response times.
MCP servers provide a standardized way for AI agents to interact with external tools and data sources. With preset MCP applications, you can quickly connect popular services with granular tool selection. For advanced integrations, custom MCP servers like Zapier give you access to 8,000+ apps without custom development.
***
## Platform Integrations
Toggle the channels your chat agent should answer on. These can come from your connected GoHighLevel subaccount and/or the new Meta integration (Facebook + Instagram).
### Meta Integration (Instagram + Facebook Pages)
To respond directly on your Instagram or Facebook Pages:
Go to **Settings → Company → Integrations**
Click **Meta**, log in, and choose the Facebook Page + Instagram account to connect
Return to **Platform Integrations** and toggle **Instagram DMs** and/or **Facebook Messenger**
**Example Use Cases:**
**Search customer data during conversations:**
* Look up customer information from spreadsheets
* Update appointment bookings in real-time
* Track conversation outcomes and lead quality
**Update customer records:**
* Create new contacts during conversations
* Update deal stages based on chat interactions
* Add conversation notes and follow-up tasks
**Send follow-up messages:**
* Email appointment confirmations
* Send Slack notifications to team
* Create tasks in project management tools
**Advanced Features:**
* **Real-time Data Access** – Query live data during conversations
* **Multi-app Workflows** – Chain actions across different services
* **Custom Authentication** – Secure access to your business tools
* **Error Handling** – Graceful fallbacks when tools fail
**Pro Tip:** Start with 2-3 essential tools and gradually add more as you become comfortable with MCP integration. Too many tools can slow down response times.
MCP servers provide a standardized way for AI agents to interact with external tools and data sources. With preset MCP applications, you can quickly connect popular services with granular tool selection. For advanced integrations, custom MCP servers like Zapier give you access to 8,000+ apps without custom development.
***
## Platform Integrations
Toggle the channels your chat agent should answer on. These can come from your connected GoHighLevel subaccount and/or the new Meta integration (Facebook + Instagram).
### Meta Integration (Instagram + Facebook Pages)
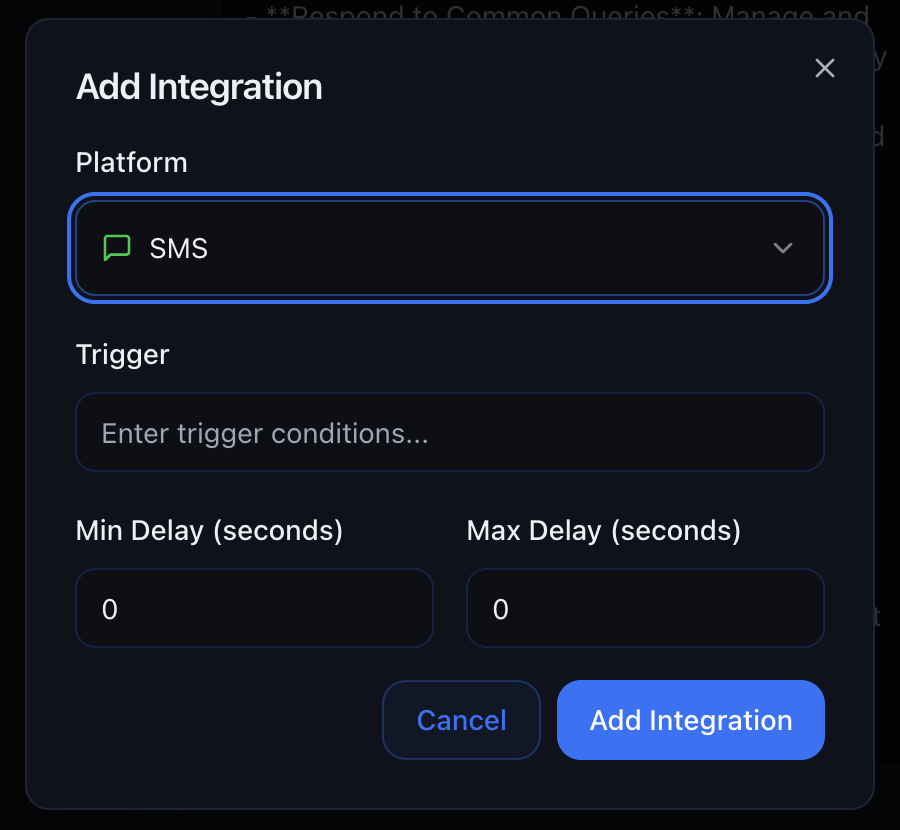
To respond directly on your Instagram or Facebook Pages:
Go to **Settings → Company → Integrations**
Click **Meta**, log in, and choose the Facebook Page + Instagram account to connect
Return to **Platform Integrations** and toggle **Instagram DMs** and/or **Facebook Messenger**
 ### Available Channels:
Automatically respond to Instagram direct messages
{" "}
Handle Facebook Messenger conversations
{" "}
Respond to emails automatically
{" "}
Answer text messages instantly
{" "}
Manage WhatsApp business conversations
Embed a chat widget on any website
**Important:** Switching a platform on means this agent will answer **all**
new messages for that channel (unless a trigger blocks it—see next section).
### Automated do-not-contact (DND)
If a contact **asks not to be contacted again** in chat or on a call, Outbox AI can **automatically mark them as DND (do not disturb)**. Once set, they will not be contacted again by your automated agents, helping you stay aligned with opt-out requests without manual tagging.
***
## Triggers for Campaigns & Keyword Flows
Triggers give you precise control over when your agent should respond. Perfect for Instagram reels, keyword campaigns, or keeping the AI silent while you chat with clients manually.
### How Triggers Work:
1. **Add a trigger word or phrase** (e.g., "start", "book", "info")
2. The agent **only wakes up** when the incoming message matches the trigger
3. Messages that don't match the trigger are ignored by the AI
### Example Use Cases:
"DM me **START** to claim your free voucher!"
The agent only responds to messages containing "start", ignoring casual comments and other DMs.
{" "}
* **"book"** → Activate booking agent - **"support"** → Activate support agent
* **"refund"** → Activate refund agent
Set a trigger so the AI doesn't interfere when you're personally chatting with VIP clients.
Leave triggers **empty** if you want the agent to respond to every message on
the enabled platforms.
***
## Delay Settings
Make your agent feel more human by adding natural response delays.
### Configuration:
* **Minimum delay** – The shortest time before the agent responds
* **Maximum delay** – The longest time before the agent responds
* The actual delay is **randomized** between these values
### Recommended Settings:
Min: 0 seconds Max: 5 seconds For time-sensitive inquiries or customer
support
{" "}
Min: 30 seconds Max: 120 seconds For conversations that should feel natural
and unhurried
{" "}
Min: 2 minutes Max: 10 minutes For lower-priority channels or when mimicking a
busy human
Min: 15 minutes Max: 60 minutes For email responses or non-urgent inquiries
**Why randomize?** A fixed delay (e.g., always 60 seconds) feels robotic.
Random delays make the agent feel more human and authentic.
***
## Automatic chat score and summary
Every chat conversation is automatically analyzed for **quality and outcome**:
* **Score** – A percentage from **0% to 100%** reflecting how well the exchange went (engagement, resolution, tone, and similar signals).
* **Summary** – A short **plain-language summary** of what was discussed or decided.
Use scores and summaries in logs and reporting to spot coaching opportunities, compare agents, and prioritize follow-up without reading full threads.
***
## Knowledge Base
Give your agent access to company information, product details, policies, and more. Choose from three methods:
Drop files directly into the knowledge base—the agent will read and understand them.
**Supported Formats:**
* 📄 PDFs
* 📝 Word documents (.docx, .doc)
* 📊 CSV files
* 📋 Plain-text files (.txt)
* 🔤 Markdown files (.md)
### Available Channels:
Automatically respond to Instagram direct messages
{" "}
Handle Facebook Messenger conversations
{" "}
Respond to emails automatically
{" "}
Answer text messages instantly
{" "}
Manage WhatsApp business conversations
Embed a chat widget on any website
**Important:** Switching a platform on means this agent will answer **all**
new messages for that channel (unless a trigger blocks it—see next section).
### Automated do-not-contact (DND)
If a contact **asks not to be contacted again** in chat or on a call, Outbox AI can **automatically mark them as DND (do not disturb)**. Once set, they will not be contacted again by your automated agents, helping you stay aligned with opt-out requests without manual tagging.
***
## Triggers for Campaigns & Keyword Flows
Triggers give you precise control over when your agent should respond. Perfect for Instagram reels, keyword campaigns, or keeping the AI silent while you chat with clients manually.
### How Triggers Work:
1. **Add a trigger word or phrase** (e.g., "start", "book", "info")
2. The agent **only wakes up** when the incoming message matches the trigger
3. Messages that don't match the trigger are ignored by the AI
### Example Use Cases:
"DM me **START** to claim your free voucher!"
The agent only responds to messages containing "start", ignoring casual comments and other DMs.
{" "}
* **"book"** → Activate booking agent - **"support"** → Activate support agent
* **"refund"** → Activate refund agent
Set a trigger so the AI doesn't interfere when you're personally chatting with VIP clients.
Leave triggers **empty** if you want the agent to respond to every message on
the enabled platforms.
***
## Delay Settings
Make your agent feel more human by adding natural response delays.
### Configuration:
* **Minimum delay** – The shortest time before the agent responds
* **Maximum delay** – The longest time before the agent responds
* The actual delay is **randomized** between these values
### Recommended Settings:
Min: 0 seconds Max: 5 seconds For time-sensitive inquiries or customer
support
{" "}
Min: 30 seconds Max: 120 seconds For conversations that should feel natural
and unhurried
{" "}
Min: 2 minutes Max: 10 minutes For lower-priority channels or when mimicking a
busy human
Min: 15 minutes Max: 60 minutes For email responses or non-urgent inquiries
**Why randomize?** A fixed delay (e.g., always 60 seconds) feels robotic.
Random delays make the agent feel more human and authentic.
***
## Automatic chat score and summary
Every chat conversation is automatically analyzed for **quality and outcome**:
* **Score** – A percentage from **0% to 100%** reflecting how well the exchange went (engagement, resolution, tone, and similar signals).
* **Summary** – A short **plain-language summary** of what was discussed or decided.
Use scores and summaries in logs and reporting to spot coaching opportunities, compare agents, and prioritize follow-up without reading full threads.
***
## Knowledge Base
Give your agent access to company information, product details, policies, and more. Choose from three methods:
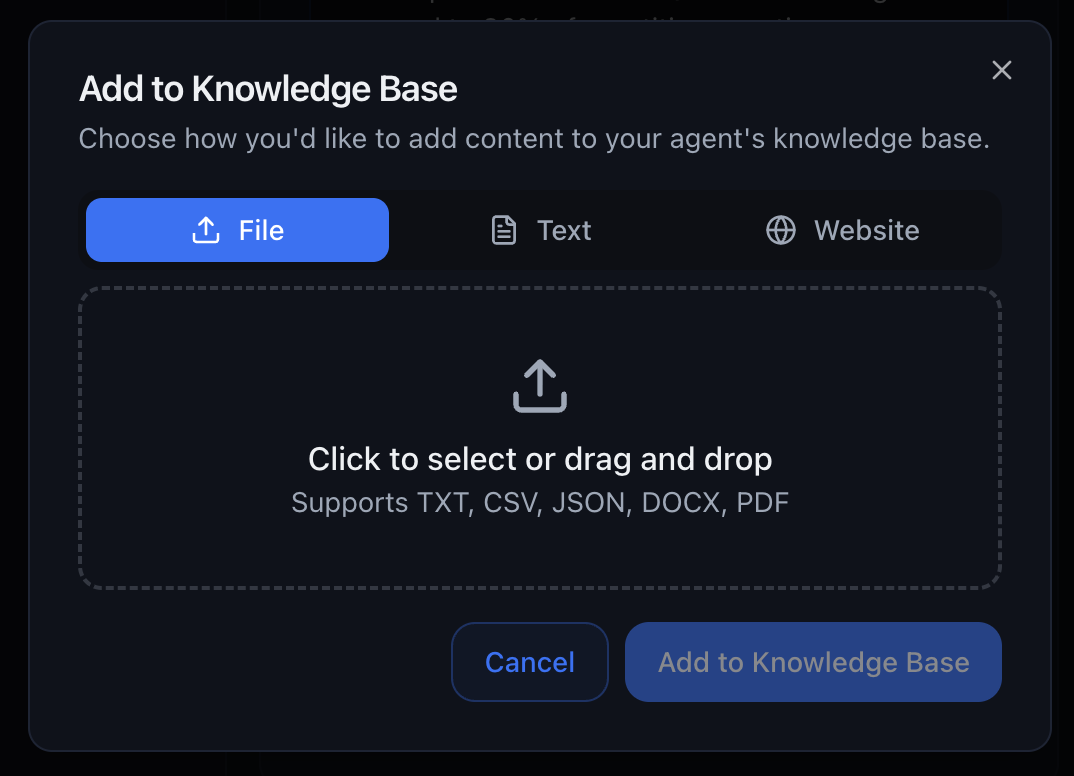
Drop files directly into the knowledge base—the agent will read and understand them.
**Supported Formats:**
* 📄 PDFs
* 📝 Word documents (.docx, .doc)
* 📊 CSV files
* 📋 Plain-text files (.txt)
* 🔤 Markdown files (.md)
 **Best for:**
* Product manuals
* Company policies
* FAQs
* Pricing sheets
* Training materials
Paste any URL and Outbox AI will scrape the entire site into clean, AI-readable Markdown.
**Powered by Firescraper** – Advanced scraping technology that handles:
* JavaScript-rendered content
* Multi-page sites
* Dynamic content
* Complex site structures
**Best for:**
* Product manuals
* Company policies
* FAQs
* Pricing sheets
* Training materials
Paste any URL and Outbox AI will scrape the entire site into clean, AI-readable Markdown.
**Powered by Firescraper** – Advanced scraping technology that handles:
* JavaScript-rendered content
* Multi-page sites
* Dynamic content
* Complex site structures
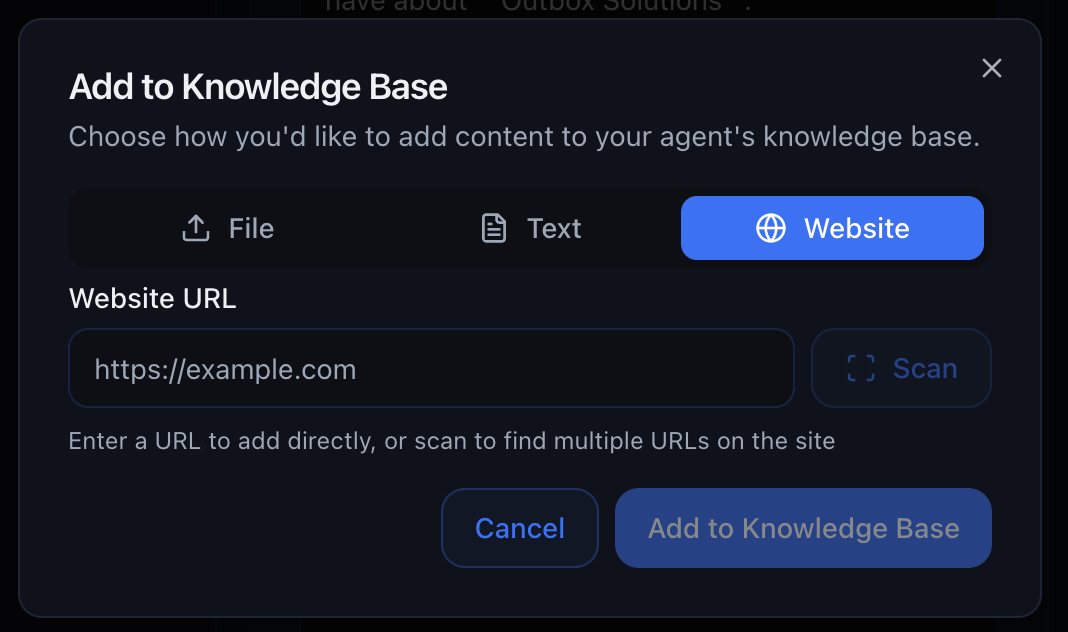 **Best for:**
* Company websites
* Product documentation
* Help centers
* Blog content
* Knowledge base articles
The scraper will follow links and capture the entire site structure, not just a single page!
Paste raw text directly into the knowledge base.
**Best for:**
* Company websites
* Product documentation
* Help centers
* Blog content
* Knowledge base articles
The scraper will follow links and capture the entire site structure, not just a single page!
Paste raw text directly into the knowledge base.
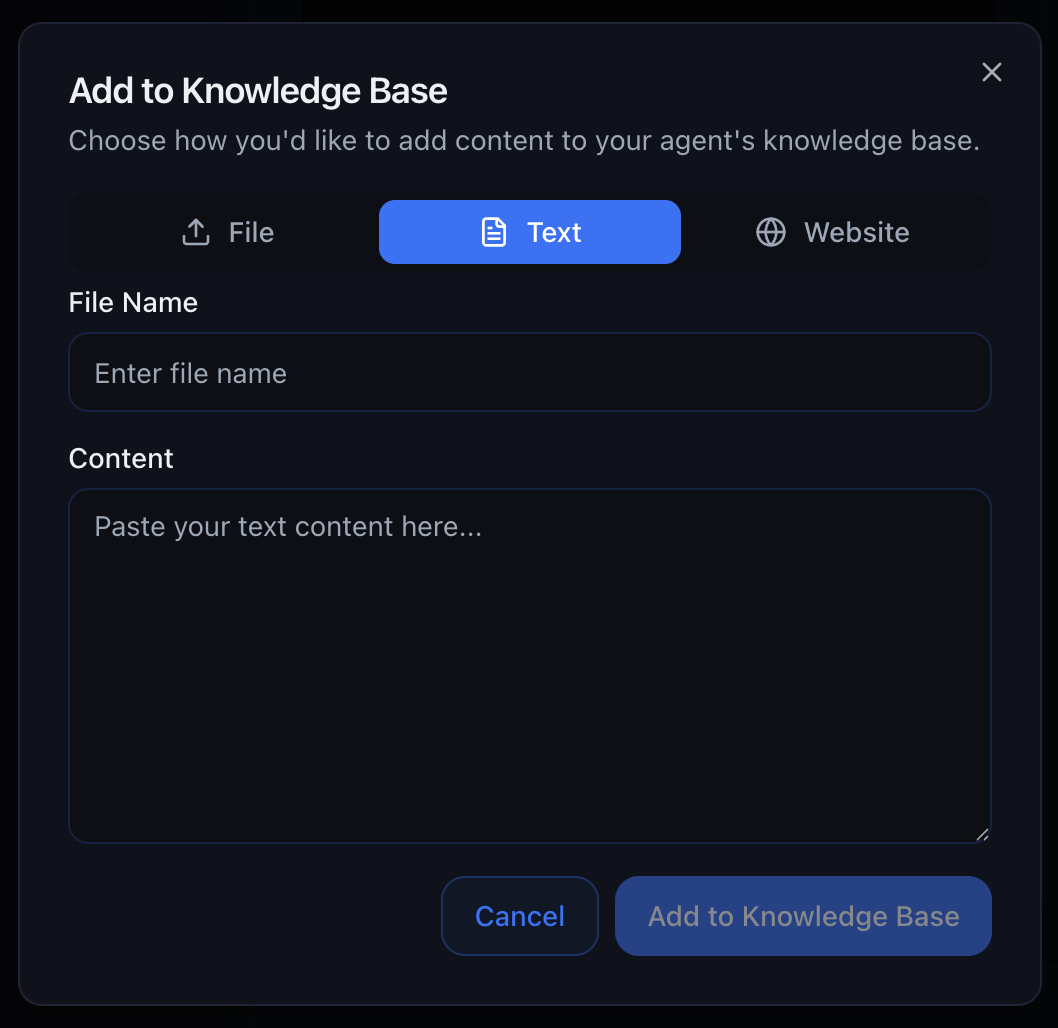 **Best for:**
* Custom instructions
* Quick reference information
* Company values and mission
* Temporary information
* Testing and prototyping
You can combine all three methods! Add files, scrape websites, **and** paste text for maximum coverage.
***
## Agent Settings
Fine-tune your agent's behavior with advanced configuration options.
### Time Zone
Set the agent's time zone to ensure accurate date and appointment logic.
The time zone affects how the agent interprets phrases like "tomorrow at 3pm"
or "next Monday."
***
### Model Selection
Choose the AI model that powers your agent. Each model has different capabilities, speeds, and costs.
**Best for:**
* Custom instructions
* Quick reference information
* Company values and mission
* Temporary information
* Testing and prototyping
You can combine all three methods! Add files, scrape websites, **and** paste text for maximum coverage.
***
## Agent Settings
Fine-tune your agent's behavior with advanced configuration options.
### Time Zone
Set the agent's time zone to ensure accurate date and appointment logic.
The time zone affects how the agent interprets phrases like "tomorrow at 3pm"
or "next Monday."
***
### Model Selection
Choose the AI model that powers your agent. Each model has different capabilities, speeds, and costs.
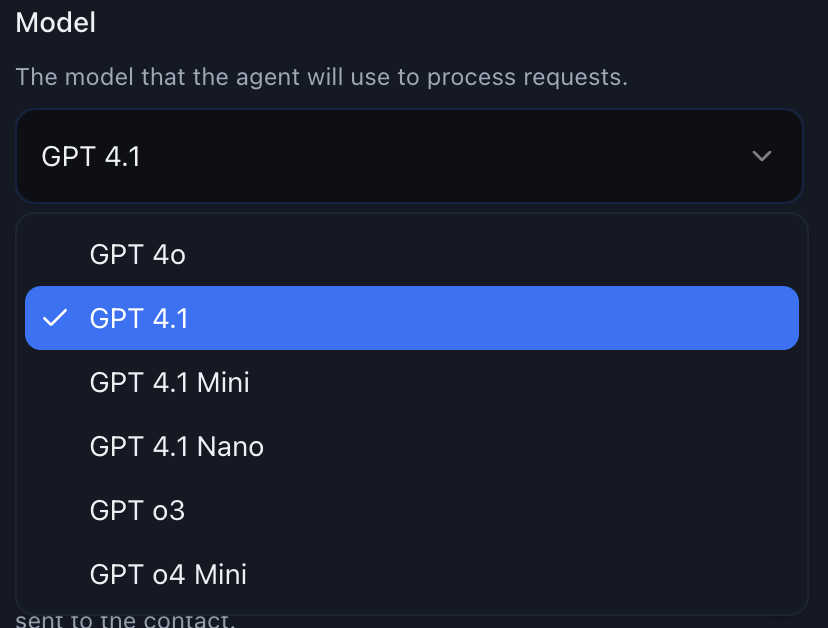 **Best balance of speed, cost, and intelligence.**
* ⚡ Fast response times
* 💰 Cost-effective for high-volume conversations
* 🧠 Excellent understanding of context and nuance
* ✅ Recommended for most use cases
**Pricing:** \~\$0.01 per conversation
**OpenAI's flagship model with superior performance.**
* 🎯 Superior reasoning ability
* 📚 Better handling of complex knowledge bases
* 💡 More creative responses
* 💸 Higher cost per conversation
**Pricing:** \~\$0.015 per conversation
**Best for:** High-value conversations, complex product lines, technical support
**Ultra-cheap, only for very basic auto-responses.**
* 🏃 Extremely fast
* 💵 Very low cost
* ⚠️ Limited reasoning ability
* 📝 Best for simple, scripted responses
**Pricing:** \~\$0.001 per conversation
**Best for:** Simple FAQs, basic greetings, keyword-based responses
**Premium accuracy with advanced reasoning capabilities.**
* 🔍 Can search the web in real-time
* 🎓 Exceptional reasoning and problem-solving
* ⏱️ Slower response times (5-15 seconds)
* 💎 Premium pricing
**Pricing:** \~\$0.05 per conversation
**Best for:** Research-heavy conversations, fact-checking, complex technical queries
**Cost Management:** Higher-tier models can significantly increase your costs.
Start with GPT-4.1 and only upgrade if you need the extra capabilities.
***
## Embed Code
Get HTML code to embed your chat widget on any website—yours or your clients'.
**Best balance of speed, cost, and intelligence.**
* ⚡ Fast response times
* 💰 Cost-effective for high-volume conversations
* 🧠 Excellent understanding of context and nuance
* ✅ Recommended for most use cases
**Pricing:** \~\$0.01 per conversation
**OpenAI's flagship model with superior performance.**
* 🎯 Superior reasoning ability
* 📚 Better handling of complex knowledge bases
* 💡 More creative responses
* 💸 Higher cost per conversation
**Pricing:** \~\$0.015 per conversation
**Best for:** High-value conversations, complex product lines, technical support
**Ultra-cheap, only for very basic auto-responses.**
* 🏃 Extremely fast
* 💵 Very low cost
* ⚠️ Limited reasoning ability
* 📝 Best for simple, scripted responses
**Pricing:** \~\$0.001 per conversation
**Best for:** Simple FAQs, basic greetings, keyword-based responses
**Premium accuracy with advanced reasoning capabilities.**
* 🔍 Can search the web in real-time
* 🎓 Exceptional reasoning and problem-solving
* ⏱️ Slower response times (5-15 seconds)
* 💎 Premium pricing
**Pricing:** \~\$0.05 per conversation
**Best for:** Research-heavy conversations, fact-checking, complex technical queries
**Cost Management:** Higher-tier models can significantly increase your costs.
Start with GPT-4.1 and only upgrade if you need the extra capabilities.
***
## Embed Code
Get HTML code to embed your chat widget on any website—yours or your clients'.
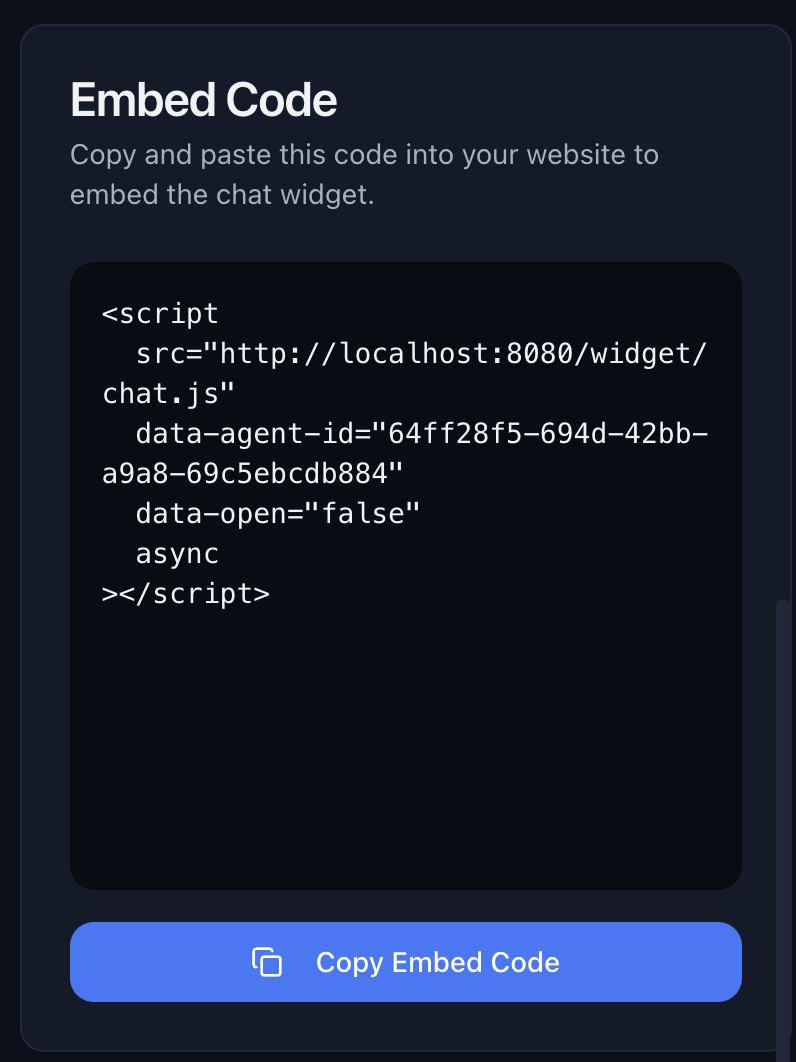 ### How to Use:
1. Copy the HTML snippet from the **Embed Code** section
2. Paste it into your website's HTML, just before the closing `` tag
3. The chat widget will appear on your site automatically
### Example Code:
```html theme={null}
### How to Use:
1. Copy the HTML snippet from the **Embed Code** section
2. Paste it into your website's HTML, just before the closing `` tag
3. The chat widget will appear on your site automatically
### Example Code:
```html theme={null}